
O'Scrap Blog Train

O'Scrap Blog Train
Member of O'Scrap Blog Train

Search This Blog

Stores I Sell At

>

Registered and Protected

Featured Post

Bunny Love

PTU Tutorial Supplies needed: Paint Shop Pro X or any version Spring_and_Easter by Alehandra Vanhek  here   (you must be licensed to use...

Popular Posts


Pammer's Passions

About Me

My photo
I've been working with PSP since 2004 and I love creating tags, stationery, cluster frames, scrap kits and templates.I also enjoy my children, grandchildren, reading, music and movies.

Followers

Blogs I Luv !

Blogs I Luv !
Addictive Pleasures

Artistic Tag Passions

Millie's PSP Madness

My Tagging Addiction

Escape From Reality

Miggins Tuts

Designz by Shelly

Melissaz Creationz

Roses Tag Templates
Thursday, September 16, 2021
PTU Tutorial


Wonderland

Supplies needed: 

Tube: Alice by Charlie from The PSP Project (closed), you must have a license to use 
Gemsmask16 or mask of your choice here
Lokas 3D Shadow here
PTU Scrap Wonderland by Bibis Collection, Here

Disclaimer: This tutorial was written by Pamela Mabry on June 1, 2013, any resemblance to anyone else’s is purely coincidental. This tutorial is written for those with a working knowledge of PSP.

Note: I wrote this tutorial after the finished product, it is given only as a guidance, the resizing , I guessed as best I could, so please feel free to play with your resizing and remember to add a drop shadow as you progress.

600 x 600 image
New layer, select all
C/P paper 11 into selection
Select none
Apply mask, merge group
C/P element 10 resize 80%
C/P element 137 resize 70%
C/P element 68, resize 70%, mirror and move it to the right 
C/P element 118, resize 60% and place as shown
C/P element 17 resize 80 %, move to left, duplicate, then mirror
C/p element 124, resize 60%
C/P your tube, resize 80%
C/P element 16, resize 70%, move left and down some, duplicate, then mirror
C/P  element 28, resize 40%, duplicate, mirror
C/P element 27, resize, duplicate, mirror
C/P element 118, resize 40%, move right by the tree
C/P element 25, resize 80%
C/p element 35, resize 70%
C/p element 121, resize to your liking
C/p element 33, resize 40% or to your liking
C/P element 119, resize 50%
Add artists copyright, url and your license
Add your name, you’re done!


Thanks for viewing my tut.


FTU Tutorial

To My Hearts Desires

Disclaimer:  This tutorial is written by Pamela on January 27, 2014 from my own imagination.
Any resemblance to any other is purely coincidental. I thank each and every designer whose creations I’ve used to create this tutorial.

This tutorial was written for those with a working knowledge of Paint Shop Pro.

Supplies needed:

PSP X6 or any PSP version
Tube of choice, I used Eugene Rhevskii ,you can purchase a license, here
Mask of choice, I used Kylie-M2, look for CMC_2012Masks1_HeartLove, thanks Kylie, here
FTU scrap, Pink Candy, thanks Vaybs here
Animation 251 by Simone, thanks Simone, here
Jasc Animation Shop here
Font of choice , I used Beautiful Ink, here

Let’s begin:

Open a 700 x 700 transparent image, fill with white
New layer, select all
C/p paper 2, paste into selection, select none
Apply Kylie_M2 mask, merge group
C/p frame9, resize 80%
Move frame to top (see my tag}
Take your magic wand and click inside the frame
Selections, modify, expand by 5
C/p paper 9 below the frame layer
Selections, invert, delete
C/p element 15, place to the left
C/p tube, resize 50%, place to the right
C/p element 5, resize 50% and turn as shown with your deform tool
C/p element 2
C/p element 3
C/p element 2
C/p element 23, resize 50%
Duplicate and place as shown
Resize tag if you like
Add your artists copyright and URL and your name.
Delete the white layer
Close the tube layer , click on the mask layer and merge visible


Animation

Open Animatiom Shop
Open animation 251, Shift + D, close original
Back to PSP and copy the bottom layer
Back to Animation Shop and paste as a new animation
Right click and duplicate selected until you have 21 frames
On the animation click on frame 1 and go to edit, select all , copy
Click on frame I of the background, edit, select all
Go back animation and click and drag onto background where you want
Go back to PSP, close background and copy your tube
Duplicate these in the same manner
Following the same process above , click drag and drop onto background frames.

Thank you for viewing my tutorial ! 

PTU Tutorial


Be My Valentine 2014!

This tutorial was written on February 2, 2014 by Pamela , from my own imagination. Any resemblance or similarity to any other is pure coincidence. This tutorial is written for those with a working knowledge of Paint Shop Pro.

Supplies needed:
Tube of choice, I used Maryline Cazenave, you need a license to use this tube, here
PTU kit, CDO Valentine Collab 2014, here

( I used the CCS portion )
Mask, Kylie-M4, here
Font, Harlow Solid Italic

Let’s begin:

Note : Remember to apply a drop shadow as you go along , I used,
 H and V – 2,
Opacity – 28,
 blur- 5, color- black
700 x 700 transparent image, fill white
New layer, select all
C/P paper 2 and paste into selection
Apply mask and merge group
C/P frame 1 and resize 80%
Change blend mode to multiply
Duplicate frame and merge down
Click inside frame with your magic wand, then expand by 10
C/P paper 5 below the frame
Selections – invert – delete
Element 8
C/P tube, resize 80%
Element 3
 Element 4
Place  all elements as shown and resize to your liking .
Place your text tool on Harlow solid italic, size 48 and type , Be My Valentine !
Add the artists copyright  , URL and your license number.
You’re done !

Thanks for viewing !!!! 

FTU Tutorial


GROOVY!


This tutorial was written on February 17, 2014 by Pamela , from my own imagination. Any resemblance or similarity to any other is pure coincidence. This tutorial is written for those with a working knowledge of Paint Shop Pro.
Disclaimer update: August 17, 2024, the store I purchased this tube from has since closed. This tutorial provides you with the current link adjustment, if you don't have a license please go here to acquire one.

Supplies needed:
PSP X6 or any working version of PSP
Tube: 3 Pin-Up Toons tubes, you need a license to use the tubes  here
FTU kit, 70's Daze here
Mask, WSL 284
Xero – Porcelain

Let’s begin:
Open frame 03, shift + D to duplicate
Close the original
Image, canvas size, 650 x 650
New layer , layers – arrange – send to bottom
Fill with white, new layers
Selection – select all
C/P paper 01 – paste into selection, select none
Apply mask, merge group
Activate your frame layer
With magic wand, hold down the shift key and click in each frame
Selections, modify, expand by 10
Activate the layer below the frame
New raster layer
C/P paper 14 and paste into selection
C/P tube close-up of your choice
Place where you want, invert – delete
C/P close up of second tube, position, invert, delete
Select none
Activate the first close up  duplicate
On duplicate apply a Gaussian blur of 5
On original apply Xero – porcelain at default settings
Repeat the same process for the other tube
Activate your top layer
C/P clip art 05, resize 80%
C/P deco02
C/P bow 01, resize 50%
C/P hemp, resize 60%
C/P beads, resize to your liking
C/P full size tube and position where you want
C/P peace sign, resize 40%
C/P flowers, resize 40%
C/P shoe01, resize 40%, duplicate and move slightly over.
Add artists copyright, url and your name.

You’re done ! 

PTU Tutorial

St. Paddy's Day


Supplies needed:
Tube, I used Patricia by Misticheskaya from Pics For Design, you must have a license to use here
Mask of choice,I used Mask 16-Leah here
Lokas 3D Shadow
Eye Candy 4000 – Gradient Glow
PTU Scrap Irish Beauty by Bibi’s Collection here

Disclaimer: This tutorial was written by Pamela Mabry on March 14, 2014, any resemblance to anyone else’s is purely coincidental. This tutorial is written for those with a working knowledge of PSP.
Note: I wrote thistutorial after the finished product, it is given only as a guidance, the resizing , I guessed as best I could, so please feel free to play with your resizing and remember to add a drop shadow as you progress, I used Lokas 3D shadow (default settings).

650 x 650 image
New layer, select all
Flood fill with 3e9a00, apply mask, resize 110%
New layer, select all
C/P paper 17 into selection
Select none
Apply mask, merge group
C/P element 55, duplicate 3 times and move to the corners of the mask
C/P element 48, resize 80%
Magic wand, hold down your shift key and click inside each frame
Highlight the paper below the frame
C/P paper 8, selections – invert -  delete, keep selected
C/P your tube close-up, position where you want and hit delete
Change blend mode to overlay
C/P element 8 and resize to your liking
Duplicate 3 times and place on different corners of the frame
Element 37
Element 43
C/P your full body tube
Add artists copyright, url and your license
Add your name, you’re done!


Thanks for viewing my tut.

 PTU Tutorial


Door To Your Dreams

Supplies needed:

Corel Paint Shop Pro X6 or any version
                                  Tube : Pin-Up Toons, you must have a license to use here
Mask of choice , I used WSL 238 Here
Lokas 3D Shadow
PTU Scrap Magical Dreams by Inzpired Creations 
SimoneAni- Lantern Light-05 Here

Disclaimer: This tutorial was written by Pamela on April 16, 2014 and is solely from my own imagination, any resemblance to anyone else’s is purely coincidental. This tutorial is written for those with a working knowledge of PSP.
Disclaimer update: August 17, 2024, the store I purchased this tube from has since closed. This tutorial provides you with the current link adjustment, if you don't have a license please go here to acquire one.

Note: I wrote this tutorial after the finished product, it is given only as a guidance, the resizing , I guessed as best I could, so please feel free to play with your resizing and remember to add a drop shadow as you progress, I used Lokas 3D shadow (default settings).

Open an 800 x 800 image , fill with white
New layer, select all
C/P paper 3 into selection
Select none
Apply mask, merge group, resize 110%
C/P the glitter, duplicate and click image , flip horizontal and move right
C/P element grass and apply a drop shadow
C/P the cloud and place as shown
C/P the lantern and place to the right
C/P flowers2 and resize to your liking
C/P mushroom1, resize 60%
C/P the door
Magic wand and hold down your shift key and click inside all openings
Selection, modify, expand by 10
C/P paper 1 and paste into selection
You should have this:

C/p leaves1, resize to your liking, duplicate and arrange as shown or to your liking
C/p the flowers, resize, duplicate and arrange
C/p mushroom, resize
C/P your tube, add drop shadow
Now you can resize your tag, I resized to 650 x 650
Add artists copyright, url and your license
Add your name, you’re done!

Animation
Open Jasc Animation Shop
Open SimoneAni lantern light-05, minimize for now
Go back to PSP, copy your tag and paste as a new animation in Ani Shop
Duplicate your tags until you have 14 frames
Click on frame 1, edit, select all
Open the animation, click in frame 1, edit, select all, edit copy
Go back to tag, edit,  paste, paste into selected frame and place into lantern
Try your animation and see if you like.


Thanks for viewing my tutorial !

Variations
PTU Tutorial


Summer Beach Fun


Supplies needed:
Corel Paint Shop Pro X6 or any version
            Tube: Estiu by Lix , you must have a license to use here
Mask of choice  I used Gems mask 72 here
Lokas 3D Shadow here
PTU Scrap Beach Cutie by Bibi here

Disclaimer: This tutorial was written by Pamela on May 12, 2014 and is solely from my own imagination, any resemblance to anyone else’s is purely coincidental. This tutorial is written for those with a working knowledge of PSP.

Let’s begin !
Open a 600 x600 image, fill white
C/p tube as a new layer, resize 80%, sharpen
Highlight raster 1
New layer, select all
C/p paper 12 and paste into selection
Apply mask, merge group
Resize mask 110%, duplicate, merge down
C/p element 63 move to bottom of masked layer
Now apply the same mask, merge group and resize 110%
C/p element 64, resize 70%, move to bottom of tag
C/p element 52, resize 70%, duplicate again and resize 70%, move right
C/p ele 83, resize 70%, move to right
C/p ele 107, rsz 40% and move right, duplicate 2 times and place left
C/p element 6, rsz 70% and place at the foot of the tree to the left, duplicate and move right
C/p ele 6 again ,rsz 40%, duplicate 6 times and arrange as shown
C/p ele 10,rsz 30%
C/p ele45, rsz 50%
C/p 49, resize 40% and rotate right 10 degrees

Add your artist name, copyright, url and your name.


You’re done !

Thanks for viewing my tutorial !

Variations


 PTU Tutorial


Time Stands Still

Supplies needed:
Corel Paint Shop Pro X6 or any version here
Tube of choice, I used an exclusive from Pics For Design,  you must have a license to use here
Mask of choice, I used WSL_238 here
PTU Scrap Time Traveller by GOF here

Disclaimer: This tutorial was written by Pamela on May 13, 2014 and is solely from my own imagination, any resemblance to anyone else’s is purely coincidental. This tutorial is written for those with a working knowledge of PSP.

Let’s begin !
Open frame 4, shift + D to copy, close original, resize 80
New layer, move to bottom and fill white
Image, canvas size, 650 x650
New layer, select all
C/p paper 6  and paste into selection
Select none, apply mask, merge group
Resize mask 110%
Highlight your frame layer
Hold down your shift key and click inside each frame opening
Selections, modify, expand by 20
Highlight the mask layer
C/p paper 9 as a new layer, selections, invert, delete
C/p your tube, resize 40% and move into frame as shown
Duplicate your tube, layers arrange send to top
Go back to the original tube layer and hit your delete
Back to the tube copy ( top layer ) and take your eraser and remove the bottom
C/p element 63, resize 40%, place bottom right, dulcate, flip and move top left
C/p element 17, move to right bottom, move under your paper layer
Duplicate, flip horizontal and move to top
C/p ele 11, rsz 40% and move right, duplicate and center
Add brightness and contrast, brightness = 40, contrast=20 and then sharpen
C/p element 8, resize 40%, move to top, sharpen, duplicate and move to bottom

Add your artist name, copyright, url and your name.

Animation

Close the white background layer and the 2 top layers
Highlight the mask layer and merge visible
Open your top gear, duplicate 4 times and rename them a, b, c, d and e
Click on layer a, image, free rotate with right checked, change to 45 degrees
B – 90
C – 180
D – 270
E – 360
Close all layers except a
Open the bottom gear, duplicate 4 times, rename 1,2,3,4 and 5
Starting with 1 repeat the process as above
Close all except 1
Copy merged and paste as new animation in animation shop
Back to PSP, close 1 and a, open 2 and b, copy merged
Back to Animation Shop and paste after current layer
Repeat this process until you have all 5 layers in Animation Shop
Select all frames and change property to 25


You’re done !

Thanks for viewing my tutorial !
PTU Tutorial


Supplies needed:
Corel Paint Shop Pro X6 or any version here
Tube of choice, I used SNC-Princess, you must have a license to use here
NOTE: this tube was purchased from a store that is now closed
Mask of choice, I used WSL221 here
PTU Scrap Welcome To Wonderland by GOF here
Simone Ani-102 Butterflies and Bugs here

Disclaimer: This tutorial was written by Pamela on May 13, 2014 and is solely from my own imagination, any resemblance to anyone else’s is purely coincidental. This tutorial is written for those with a working knowledge of PSP.
Let’s begin !
Open a 650 x650 transparent image, fill white
New raster layer
Selections, select all
C/p paper 1 and apply mask, merge group
C/p element 45, resize 80%
C/p element 74
C/p element 3 and place on bottom right, duplicate and move left
C/p element 105, resize 60%
C/p element 36, resize 20%
C/p element 1, resize 80%, move left
C/p element 64, resize 20%, place as shown
C/p element 16, resize 40%
C/p butterfly, resize 40%, move bottom right
Duplicate and resize 80% and move top right
Add the artist copyright, your license number and your name.

To Animate

Delete background layer and merge visible, copy and paste into Animation Shop
Highlight and duplicate until you have 35 frames, select all frames
In Animation shop open Simone Ani-102
Select all, copy
Back to tag, edit, paste, paste into selected frame
Now try your animation
If satisfied, save.


Thanks for viewing !!!!! 

FTU Tutorial

Blissful Christmas

This tutorial was written on November 12, 2014 by Pamela , from my own imagination. Any resemblance or similarity to any other is purely coincidence. This tutorial is written for those with a working knowledge of Paint Shop Pro.

Note: This tutorial is only a guide, you will need to resize some items to your own specifications.

Supplies needed:
PSP X7 or any working version of PSP
Tube of choice, I used Amberly Berendson, Candy Pixies
you need a license to use this tube, you will find it here
FTU kit, Elf and Candy Cane by Amy of  Gimptastic Tuts
Mask, BBD_2012_Mask_167  or mask of your choice
Lokas 3D Shadow

Let’s begin:
Open 700 x 700 transparent image
Fill with white
New raster layer
C/p paper 9
Apply mask, merge group
Duplicate mask, merge down
C/P fireplace and move to bottom
C/p hanging stockings, resize 80 %
C/p card, resize 80% and to top middle
C/p candle, resize 60%
C/p tree
C/p gift and then c/p the other gift. Resize both to your liking
C/p pixie 1, pixie 2 and then the tube.
Add a drop shadow of your choice to all the layers
I used Lokas 3D shadow in default settings.
Resize, if you want to.

You’re done !


I hope you enjoyed my tut and thanks for viewing ! 


PTU Tutorial

Fairy So Purple


Supplies needed:

Paint Shop Pro X8 or any version will work
Font of choice, I used Sloop Script Bold Two
Purple Fairy PTU Scrap Kit by Blissful Designs, you can find it at ( store closed and the designer retired)
Tube of choice, I used Alena Lazareva, you can purchase at CDO
Please don't use this tube without a license
WSL_Mask 226

Disclaimer: This tutorial is written by Pamela Mabry on August 2.2016 from my own imagination, any resemblance or similarity to any other is purely coincidental. This tutorial is written for those with a working knowledge of Paint Shop Pro.

Note: I only used a drop shadow on the more colorful elements with 100% opacity.You can decide which you want to shadow. I used v 2, h  2, opacity 15, blur 5

Abbreviations:

C/P = copy and paste
F/F = Flood Fill
P/N/L = Paste as new layer
D/S = drop shadow
S/SA = selections/select all
R/S = Resize

Let's begin:

Open a 700 x 700 transparent image
F/F with white
Add a new raster layer
Selections, select all
C/P paper 9 and paste into selection
Deselect
Apply mask, merge group
C/P element 21 , P/N/L , duplicate and image, mirror horizontal
C/P element 20, P/N/L and position where you like
C/P element 13, P/N/L and move to the left edge of the mask
Duplicate element 13 and mirror horizontal
C/P element 32. P/N/L and resize 80%
C/P element 34 and move to the left
C/P element 16 and paste on top of previous element
C/P element 4 and paste to the right on top of frame
C/P element 22 and paste, move to the right
C/P element 25 and paste, place where you want
C/P element 8 and P/N/L and move to bottom of frame, resize 80%
C/P element 5, resize 40 % and place to the right
C/P element 18, paste and place to top right
C/P element 22 and center
C/P element 26, resize 60%
C/P element 41 on top of the frame, resize 80% and move to left bottom
C/P element 55, resize 60% and move to bottom center of frame
C/P your tube, add drop shadow of choice , I used v and h -2, opacity - 15, blur - 5
Add artists name and copyright and your name
We are done, thank you for viewing my tutorial !

Variations


Tuesday, September 14, 2021

 PTU Tutorial


Believe !


Disclaimer:  This tutorial is written by Pamela on October 9, 2020 from my own imagination. Any resemblance to any other is purely coincidental. I thank each and every designer whose creations I’ve used to create this tutorial.


Supplies needed:

PSP 2020 or any version

Tube of choice, I used, Believe 2012 by  Zindy S. D. Nielsen, you can purchase a license, here

Mask of choice, I used 179, here

PTU scrap, BCA, by Uenique PSP, you can purchase from any store I sell in

Font of choice 


Let’s begin:

Open frame 06, shift + D to copy, close image

Resize 80%

New layer, send to bottom

Magic wand, click inside frame, expand 10%

C/p paper 011, paste into selection

C/p tube close up and p/n/l

Move left

c/p tube  and p/n/l

Move right, copy tube and move to top

Eraser tool and erase the part of tube on top of frame

Apply drop shadow of tube layers, I used lokas 3d shadow

New layer, move to bottom, select all

C/p paper 08 and paste into selection, select none

C/p element 13, place to the left

C/p element 21, resize 80% 

C/p element 20

C/p element 33

C/p element 61

C/p element 64

C/p element 65

C/p element 66

C/p element 17

C/p element 49

C/p element 15

Delete background tag and merge visible

Resize tag if you like

Add your artists copyright and URL and your name.


Thank you for viewing my tutorial !  

MMD Lifetime CU4CU Licence

MMD Lifetime CU4CU Licence

MMD Unlimited CU Licence

MMD Unlimited CU Licence

Miggin's Extended CU4CU License
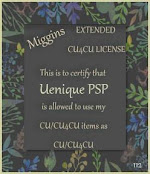
Miggin's Extended CU4CU License

Denise Creationz Unlimited Use License
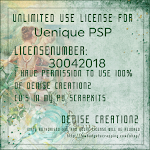
Denise Creationz Unlimited Use License

Denise Creationz CU4CU License
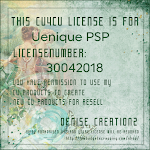
Denise Creationz CU4CU License

KPD Unlimited Use CU4CU License

KPD Unlimited Use CU4CU License

Scraps Dimensions CU4CU Lifetime License
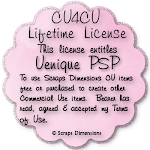
Scraps Dimensions CU4CU Lifetime  License

LMB CU4CU License
LMB CU4CU License

JDD Unlimited Personal Use License
JDD Unlimited Personal Use License

JDD CU4CU License
JDD CU4CU License

Freek's Creations CU4CU License

Freek's Creations Unlimited Use License

Angelaz Creationz CU4CU License

Bubble's Dreams CU Lifetime License