Search This Blog
Featured Post
Bunny Love
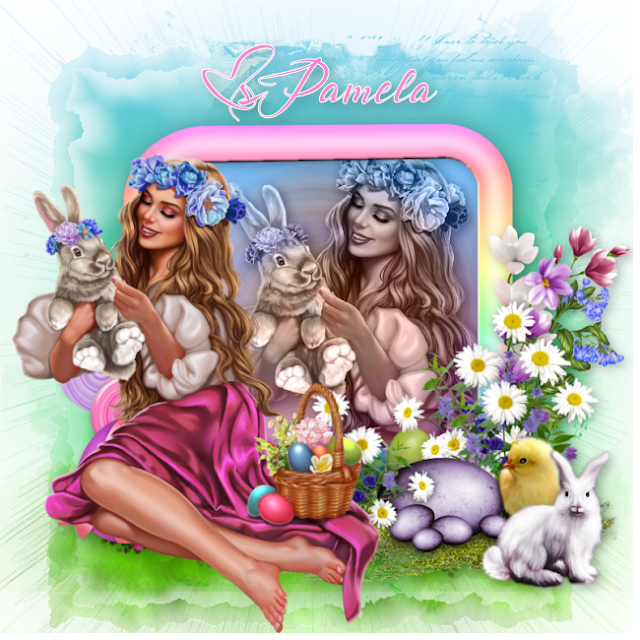
PTU Tutorial Supplies needed: Paint Shop Pro X or any version Spring_and_Easter by Alehandra Vanhek here (you must be licensed to use...
Popular Posts
-
No Scrap Tutorial Curled and Whirled Supplies Needed: Tube of choice, I used Amberly Berendson, you can purchase at DAH Font of choice, I u...
-
FTU Tutorial Ice Cream, Cupcakes and Chocolate Supplies needed: Neopolitan Scrap kit by TKDezigns here Tube of choice, I used Fiodorova Ma...
-
FTU Tutorial The Book of Elias Supplies needed : Tube: I used Melissa 2 by Elias Chatzoudis here you need a license to use this art, Fr...
-
No scrap tutorial Majestic Mermaid Items needed: PSP9 or any version DBV Mask 110 here Scenic photo of choice,I used Jon Rattenbury, you m...
-
FTU Tutorial With A Tender Heart Disclaimer: This tutorial was written by Pamela A. Mabry on January 11, 2022 with PSP 10, but any other ve...
-
FTU Animated Tutorial Turbulent Sea Tag Disclaimer: This tutorial was originally written August 12, 2012 and revised on January 14, 2022 fr...
-
No scrap tutorial Capsulated Tag This tutorial is written for those with a working knowledge of PSP. Disclaimer update: August 17, 2024, t...
-
No scrap tutorial Fairy Glass Banner Supplies needed: Tube of choice I used Judy Mastrangelo this is a licensed tag and can be purchased F...
-
FTU Tutorial BCA In Pink Supplies needed: Paint Shop Pro 2021 or any version Tube: I Believe by Zindy S. D. Nielsen here Becky Mask...
-
PTU Tutorial BCA Survivor Supplies needed: Paint Shop Pro 2021 or any version Tubes: Elias Chatzoudis I’m Still Gorgeous, You Can Win,...
About Me

- P Mabry
- I've been working with PSP since 2004 and I love creating tags, stationery, cluster frames, scrap kits and templates.I also enjoy my children, grandchildren, reading, music and movies.
Followers
Showing posts with label Pin-Up Toons. Show all posts
Showing posts with label Pin-Up Toons. Show all posts
Wednesday, January 12, 2022
5:47 PM | Edit Post
FTU Tutorial
With A Tender Heart
Disclaimer: This tutorial was written by Pamela A. Mabry on January 11, 2022 with PSP 10, but any other version will work. It is composed from my own imagination, any similarities to anyone else is purely coincidental or accidental. This tutorial is written for those with a working knowledge of Paint Shop Pro. Thank you for stopping in and enjoy !
Disclaimer update: August 17, 2024, the store I purchased this tube from has since closed. This tutorial provides you with the current link adjustment, if you don't have a license please go here to acquire one.
Materials needed:
Miz_Tenderness Scrap kit here
Miz_mask 289 here
Pin-up Toons, Purple Fae which you need a license to use here
Cassandra font here
Let's begin:
open a 700 x 700 image fill white
New layer, select all
Open paper 1 and paste into selection
Apply mask, merge group
Duplicate mask layer, merge down
Duplicate again, image, flip
C/P element 29 move left and lower opacity to 30%
element 35
element 56
element 20
element 28
element 34
element 42
element 50
C/p your tube
add artists name and copyright
Add the name you want on tag
You're done !
Labels:FTU,FTU Tutorial,Pin-Up Toons,Valentines Day | 0
comments
Thursday, September 16, 2021
12:53 PM | Edit Post
FTU Tutorial
The Pink Star Squad
Supplies
PSP9 or any working version
Tubes by Pin-up Toons, you must have a license to use these tubes, you can purchase here
Pink’d Updated FTU by Manipulated by Magik here
April Stars masks 3 and 4 by Rhon here
Font of choice, I used Carlotta here
Xero – Radiance here
Lokas 3D shadow here
Disclaimer: This tutorial was written by Pamela A. Mabry on May 15, 2013 and is solely from my own imagination. Any resemblance to anyone else’s is purely coincidental. This tutorial was written for those with a working knowledge of PSP.
Disclaimer update: August 17, 2024, the store I purchased this tube from has since closed. This tutorial provides you with the current link adjustment, if you don't have a license please go here to acquire one.
Gratuity: Special heartfelt thanks to Magik for the awesome scrap kit and Rhon for her beautiful masks.
Let’s begin !
700 X 700 image
New layer, select all
C/p paper 16 into selection, select none
C/p glitter splatter, resize 110%
Apply mask 4, merge group, duplicate, merge down, change opacity to 30%
New layer, select all
C/p paper 17 into selection
Apply mask 3, merge group, resize 95%
Duplicate mask, merge down
C/p frame 3 as a new layer
Use your magic wand and click inside the frame, expand by 10
C/p paper 17 as a new layer under the frame, invert, delete
C/p a close up of your tube, position where want and hit your delete key
Duplicate your tube
On original apply a Gaussian blur of 10
On tube copy apply Xero radiance
Apply Lokas 3D shadow to the tube and frame
Apply the following elements and resize as stated, place where you want or see my tag
Add a drop shadow as you go along
Purse 40%
Computer 60%
Shoe 20%, duplicate and position as shown
Martini 20%
iPod 30%
Cell phone 20%
If you used the same tubes I did, now c/p the full body tubes from each pack and place as you like
At this point, if you want, resize your tag
Add artists copyright, url and your name.
You’re done !
Thanks for visiting my blog !
Labels:FTU,FTU Tutorial,Pin-Up Toons,tutorial | 0
comments
10:43 AM | Edit Post
This tutorial was written on February 17, 2014 by Pamela , from my own imagination. Any resemblance or similarity to any other is pure coincidence. This tutorial is written for those with a working knowledge of Paint Shop Pro.
Disclaimer update: August 17, 2024, the store I purchased this tube from has since closed. This tutorial provides you with the current link adjustment, if you don't have a license please go here to acquire one.
Supplies needed:
PSP X6 or any working version of PSP
Tube: 3 Pin-Up Toons tubes, you need a license to use the tubes here
FTU kit, 70's Daze here
Mask, WSL 284
Xero – Porcelain
Let’s begin:
Open frame 03, shift + D to duplicate
Close the original
Image, canvas size, 650 x 650
New layer , layers – arrange – send to bottom
Fill with white, new layers
Selection – select all
C/P paper 01 – paste into selection, select none
Apply mask, merge group
Activate your frame layer
With magic wand, hold down the shift key and click in each frame
Selections, modify, expand by 10
Activate the layer below the frame
New raster layer
C/P paper 14 and paste into selection
C/P tube close-up of your choice
Place where you want, invert – delete
C/P close up of second tube, position, invert, delete
Select none
Activate the first close up duplicate
On duplicate apply a Gaussian blur of 5
On original apply Xero – porcelain at default settings
Repeat the same process for the other tube
Activate your top layer
C/P clip art 05, resize 80%
C/P deco02
C/P bow 01, resize 50%
C/P hemp, resize 60%
C/P beads, resize to your liking
C/P full size tube and position where you want
C/P peace sign, resize 40%
C/P flowers, resize 40%
C/P shoe01, resize 40%, duplicate and move slightly over.
Add artists copyright, url and your name.
You’re done !
Labels:70's,FTU,FTU Tutorial,Pin-Up Toons | 0
comments
10:09 AM | Edit Post
PTU Tutorial
Door To Your Dreams
Supplies needed:
Corel Paint Shop Pro X6 or any version
Tube : Pin-Up Toons, you must have a license to use here
Mask of choice , I used WSL 238 Here
Lokas 3D Shadow
PTU Scrap Magical Dreams by Inzpired Creations
SimoneAni- Lantern Light-05 Here
Disclaimer: This tutorial was written by Pamela on April 16, 2014 and is solely from my own imagination, any resemblance to anyone else’s is purely coincidental. This tutorial is written for those with a working knowledge of PSP.
Disclaimer update: August 17, 2024, the store I purchased this tube from has since closed. This tutorial provides you with the current link adjustment, if you don't have a license please go here to acquire one.
Note: I wrote this tutorial after the finished product, it is given only as a guidance, the resizing , I guessed as best I could, so please feel free to play with your resizing and remember to add a drop shadow as you progress, I used Lokas 3D shadow (default settings).
Open an 800 x 800 image , fill with white
New layer, select all
C/P paper 3 into selection
Select none
Apply mask, merge group, resize 110%
C/P the glitter, duplicate and click image , flip horizontal and move right
C/P element grass and apply a drop shadow
C/P the cloud and place as shown
C/P the lantern and place to the right
C/P flowers2 and resize to your liking
C/P mushroom1, resize 60%
C/P the door
Magic wand and hold down your shift key and click inside all openings
Selection, modify, expand by 10
C/P paper 1 and paste into selection
You should have this:
C/p leaves1, resize to your liking, duplicate and arrange as shown or to your liking
C/p the flowers, resize, duplicate and arrange
C/p mushroom, resize
C/P your tube, add drop shadow
Now you can resize your tag, I resized to 650 x 650
Add artists copyright, url and your license
Add your name, you’re done!
Animation
Open Jasc Animation Shop
Open SimoneAni lantern light-05, minimize for now
Go back to PSP, copy your tag and paste as a new animation in Ani Shop
Duplicate your tags until you have 14 frames
Click on frame 1, edit, select all
Open the animation, click in frame 1, edit, select all, edit copy
Go back to tag, edit, paste, paste into selected frame and place into lantern
Try your animation and see if you like.
Thanks for viewing my tutorial !
Variations
Labels:Pin-Up Toons,PTU,tutorial | 0
comments
Subscribe to:
Posts
(Atom)
Labels
- 4th of July
- 70's
- aetherize
- Alehandra Vanhek
- Alena Lazareva
- Alex Prihodko
- Alicat Art
- Amberly Berendson
- AngelWingScraps
- animated
- art
- artist
- Autumn
- Awareness
- AWS Scraps
- BCA
- beach
- BellaCaribena
- Blissful Designs
- BTS
- Charlie
- Christmas
- CTTutorial
- Deedles N Doodles
- DeedlesNDoodles
- Designs by Shelly
- domestic violence
- DVA
- Easter
- Easter. FTU tutorial
- Elias Chatzoudis
- Eugene Rhevskii
- fairies
- fairy
- Fall
- fantasy
- Fiodorova Maria
- FiodorovaMaria
- flood
- FTU
- FTU Tutorial
- fun
- GOF
- Goldwasser
- Hania's Designs
- Ismael Rac
- Judy Mastrangelo
- Keith Garvey
- KennyK
- Kiya Designs
- Kiya's Designs
- Lady Mishka
- Laguna
- Lix
- Mardi Gras
- Maryline Cazenave
- Melissaz Creationz
- mermaid
- Misticheskaya
- mistified
- Mizteeque
- no scrap
- patriotic
- PFD
- Pin-Up Toons
- pink
- princess
- PTU
- PTU tutorial
- Rachel Anderson
- sea
- Sherri Baldy
- Simone
- Sophisticat Simone
- Souldesigner
- spring
- St. Patrick's Day
- St> Patrick's Day
- steampunk
- StellaFeliceArt
- Tamara SV
- The Paper Shelter
- Tiny Turtle Designs
- Tony Tzanoukakis
- Toosh Toosh
- turbulent
- tutorial
- UeniquePSP
- Valentines Day
- Very many
- white
- Zindy
Blog Archive
Miggin's Extended CU4CU License
Denise Creationz Unlimited Use License
Denise Creationz CU4CU License
KPD Unlimited Use CU4CU License
Scraps Dimensions CU4CU Lifetime License
LMB CU4CU License
JDD Unlimited Personal Use License
JDD CU4CU License
