O'Scrap Blog Train

Member of O'Scrap Blog Train
Stores I Sell At
 >
>Registered and Protected

Featured Post
Bunny Love
PTU Tutorial Supplies needed: Paint Shop Pro X or any version Spring_and_Easter by Alehandra Vanhek here (you must be licensed to use...

Popular Posts
-
FTU Tutorial The Book of Elias Supplies needed : Tube: I used Melissa 2 by Elias Chatzoudis here you need a license to use this art, Fr...
-
 No scrap tutorial Majestic Mermaid Items needed: PSP9 or any version DBV Mask 110 here Scenic photo of choice,I used Jon Rattenbury, you m...
 -
 No Scrap Tutorial Curled and Whirled Supplies Needed: Tube of choice, I used Amberly Berendson, you can purchase at DAH Font of choice, I u...
 -
 FTU Tutorial Ice Cream, Cupcakes and Chocolate Supplies needed: Neopolitan Scrap kit by TKDezigns here Tube of choice, I used Fiodorova Ma...
 -
FTU Tutorial With A Tender Heart Disclaimer: This tutorial was written by Pamela A. Mabry on January 11, 2022 with PSP 10, but any other ve...
-
 FTU Animated Tutorial Turbulent Sea Tag Disclaimer: This tutorial was originally written August 12, 2012 and revised on January 14, 2022 fr...
 -
 PTU Tutorial Yellow's Glow! Supplies needed: Paint Shop Pro 2023 or any version Tube: Summer by Kiya's Designs here Mask: DBV...
 -
 No scrap tutorial Capsulated Tag This tutorial is written for those with a working knowledge of PSP. Disclaimer update: August 17, 2024, t...
 -
 FTU Tutorial BCA In Pink Supplies needed: Paint Shop Pro 2021 or any version Tube: I Believe by Zindy S. D. Nielsen here Becky Mask...
 -
 No scrap tutorial Fairy Glass Banner Supplies needed: Tube of choice I used Judy Mastrangelo this is a licensed tag and can be purchased F...



Pammer's Passions
About Me

- P Mabry
- I've been working with PSP since 2004 and I love creating tags, stationery, cluster frames, scrap kits and templates.I also enjoy my children, grandchildren, reading, music and movies.
Blogs I Luv !

Addictive Pleasures

Artistic Tag Passions

Millie's PSP Madness

My Tagging Addiction

Escape From Reality

Miggins Tuts

Designz by Shelly

Melissaz Creationz

Roses Tag Templates
PTU Tutorial

Stop The Violence!
Supplies needed:
Paint Shop Pro 2021 or any version
Violet Dreams tube by Amberly Berendson here
You must have a license to use this tube
(N0te) This tube was purchased at My Tubed Art which is no longer open
WSL_ Mask 226 Here
Awareness BCA – DVA by Uenique PSP Here Here
Font: Andantino script Here
Disclaimer: This tutorial is written by Pamela Mabry on September 13, 2021 and is solely from my own imagination, any similarity to any other/s is pure coincidence. This tutorial is written for those with a working knowledge of Paint Shop Pro.
Remember to apply your drop shadow as you proceed.
I used V -2, H 3, O 30, B 10
Let’s begin
Open paper 5, shift _ d, close original
Right click on the layers palette and promote background layer
Add new layer and fill with white, send to bottom
Activate paper layer and apply mask, merge group,
Resize 120%
Paste frame 17
Use your magic wand to click inside the frame
Expand 10%
Add new layer under the frame layer
Copy paper 26 and paste into selection
Keep selected and paste the tube as a new layer, apply overlay, duplicate 2 times
Apply Xero - porcelain
Paste element 128 and move to bottom left, duplicate, mirror
Paste element 13 resize 60%, place bottom left, duplicate, mirror
Paste element 73 resize 30% move to bottom right
Paste element 120 resize 40%
Copy and paste 106 resize 30%
Paste 188 resize 70%, move down a layer
Element 147 resize 30%
Element 167 resize30%
Element 129 resize 60%
Element 186 resize 30%
Paste 122 resize 80%, paste on top of the frame layer
Paste 23 resize 60%
Paste 98 resize 40% place top left
Paste element 28 resize 40%
Copy your tube and paste on top of frame layer and place to the right
Merge visible and resize if needed
Add the artist name , copyright and your license number
Add your name
Merge visible
You’re done !
Thanks for stopping by !
No Scrap Tutorial


Hope you enjoyed !!!!!
FTU Tutorial

I hope you enjoyed my tut and thanks for viewing !
MMD Lifetime CU4CU Licence

MMD Lifetime CU4CU Licence
MMD Unlimited CU Licence

MMD Unlimited CU Licence
Miggin's Extended CU4CU License
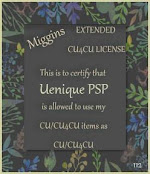
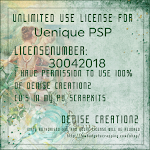
Denise Creationz Unlimited Use License
Denise Creationz CU4CU License
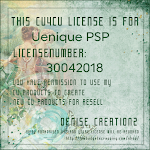
KPD Unlimited Use CU4CU License

Scraps Dimensions CU4CU Lifetime License
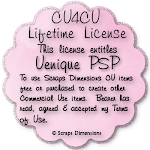
LMB CU4CU License
JDD Unlimited Personal Use License
JDD CU4CU License
Freek's Creations CU4CU License

Freek's Creations Unlimited Use License

Angelaz Creationz CU4CU License

Bubble's Dreams CU Lifetime License
