O'Scrap Blog Train

O'Scrap Blog Train
Member of O'Scrap Blog Train

Search This Blog

Stores I Sell At

>

Registered and Protected

Featured Post

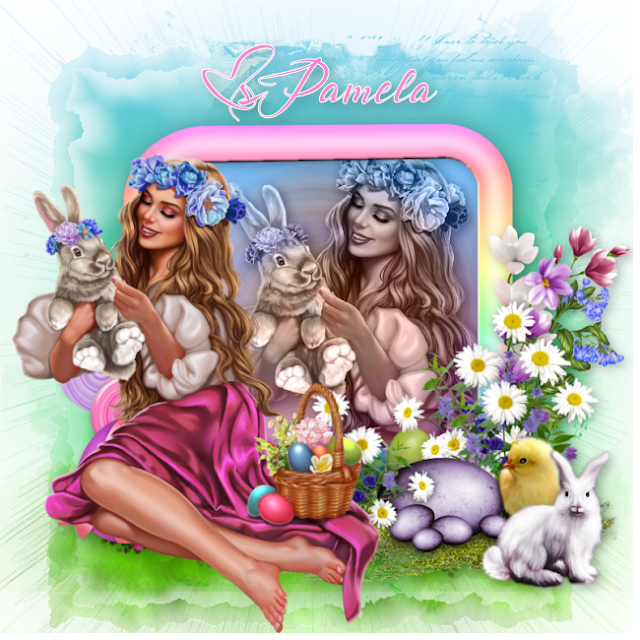
Bunny Love

PTU Tutorial Supplies needed: Paint Shop Pro X or any version Spring_and_Easter by Alehandra Vanhek  here   (you must be licensed to use...
Popular Posts


Pammer's Passions

About Me

My photo
I've been working with PSP since 2004 and I love creating tags, stationery, cluster frames, scrap kits and templates.I also enjoy my children, grandchildren, reading, music and movies.

Followers

Blogs I Luv !

Blogs I Luv !
Addictive Pleasures

Artistic Tag Passions

Millie's PSP Madness

My Tagging Addiction

Escape From Reality

Miggins Tuts

Designz by Shelly

Melissaz Creationz

Roses Tag Templates
Thursday, September 16, 2021


PTU Tutorial

 Dream State 


Disclaimer: This tutorial is written solely by Pamela Mabry on September 9, 2021 and is from my own imagination, any similarity to any other is purely coincidental. This tutorial is written for those with a working knowledge of Paint Shop Pro.

Supplies needed:

Paint Shop Pro 2021 or any version

Beauty Sleep tube by Zindy, you must have a license to use this tube, here

Romantic Past Scrap Kit by Artistic Studio, here

Miz_Mask 222 Here

Font of choice, I used Cassandra here


Let’s get started:

Reminder: Apply your drop shadow as you go, I used H -2,  V -2, Opacity 30 and Blur 10

 Open paper 21, shift + D to copy, close original

Right click, promote background layer

New layer, send to bottom and fill white

Apply mask, merge group

Pick tool and stretch your mask to cover more space

Paste your tube and apply drop shadow

Move toward the bottom

Highlight your mask layer

New layer, select all

Paste paper 23 into selection, select none

Apply mask, merge group

Change blend to overlay and opacity to 22

Paste element 90, resize 30%

Place under tube on the outside of the head

Apply drop shadow, duplicate, mirror, merge down

Duplicate, mirror vertical then flip vertical, merge down

Resize 90%

Paste element 127, resize 60%

Duplicate, mirror horizontal, merge down

Duplicate, mirror vertical, merge down

Paste element 110, resize 60%

Apply drop shadow, duplicate, mirror horizontal, merge down

Duplicate, mirror vertical

Merge all flower layers down, resize 80%

Paste element 40 and move up a little

Magic wand, hold down the shift key and click in all the windows empty spaces

Expand by 10

Highlight the layer under the window

Add new layer

Paste paper 10 into selection

Paste your tube and place where you choose

Selection, invert, delete

Change blend mode to luminance (legacy)

Paste element 3, resize 40%

Paste element 1, resize 40%

Paste element 14, resize 50%

Paste element 148, resize 70%

Duplicate, mirror, merge down

Duplicate, mirror vertical, merge down

Element 15, resize 40%

Element 111, resize 30%

Element 50, resize 60%

Element 144, resize 70%

Apply artist copyright and license number

Apply your name

Merge visible, save.

Resize to your liking

You’re done !


Thank you for viewing my tutorial ! 


FTU Tutorial

The Book of Elias


Supplies needed:

Tube: I used Melissa 2 by Elias Chatzoudis here
 you need a license to use this art,
Frame UP_a92bg5 by me here 
Xero - porcelaine here
Athletic font here
Arizonia font here
Mask of choice I used WSL_226  here
FTU scrap Miz-Floral Dreams by Mizteeque, you can get here here

Disclaimer:
This tutorial was rewritten by Pamela A. Mabry on Jan 13, 2022 with PSP X. I chose to rewrite it due to some items being no longer available. In the event, this tutorial resembles any other, it is purely coincidental or accidental, it is solely from my own imagination. This tutorial is written for those with a working knowledge of PSP.
Disclaimer update: August 17, 2024, the store I purchased this tube from has since closed. This tutorial provides you with the current link adjustment, if you don't have a license please go here to acquire one.

Let's Begin

Open a frame  shift + d to copy , resize frame 90%
New raster layer and send to bottom - select all
Open paper 4 copy and paste into selection
Apply WSL Mask_226 - merge group - resize 120%
Open element 47 - copy- paste - resize 80%
Magic wand- click inside frame - selections - modify - expand by 20
Paper 2 - copy - paste into selection
Copy tube - paste as new layer - duplicate tube
Layers, arrange move to top
Go back to the other tube layer  and move tube to the left
Apply blend mode - overlay
Apply Xero - porcelaine at default settings
Element 47 - copy - paste as new layer, resize 80%, Image, flip, move to bottom of frame  
Element 38 copy - paste - resize-40% place to bottom right of frame
Duplicate - mirror
Element 10 - copy - paste -resize 40%
Element 29- copy - paste - resize 40%
Element 16 resize 30%
Element 37 - copy- paste - resize 40% 
Element 31 - copy - paste - resize - duplicate 2 x's and place as shown
Open element 32 - copy - paste - resize 
Element 60 - copy - paste -resize - place as shown
Element 46 copy - paste - resize - place as shown
With font of your choice, I used athletic, write The Book of Elias on your book

Add artist copyright, license and your name

Hooray, you're done !
I hope you enjoyed !

No scrap tutorial


Fairy Glass Banner

Supplies needed:

Tube of choice I used Judy Mastrangelo
 this is a licensed tag and can be purchased 
Font of choice
Eye Candy 4000 Filter - Glass Demo Here
Gold Pattern

Let's begin !

Open a 700 x 200 transparent image
With dropper tool choose a color that you like from your tube
Fill your image with the color
Minimize for later
Go to your tube - edit - copy
Right click on any free space on your work area and paste as a new image
Image - rotate 90 degrees left - all layers checked
Right click on the blue bar and choose copy
Now activate your minimized image - selections - select all
Right click the blue bar of the image and scroll to paste - paste into selection - de-select
Adjust - blur - radial blur with these settings: Twirl- Twirl strength-55 -
Twirl degrees 70 - H & V -0 protect center-0 elliptical -checked click OK
Effects - distortion effects - Warp H - 100 V - 0 size - 80 strength - 70 click OK
Layers - duplicate
Image - mirror
Click on your selection tool now choose custom select tool with settings:
Top -0 left -350 right -700 bottom -200 click OK
Hit your delete key
Layers - merge - merge visible
Go to your tube - shift + D to duplicate, minimize your original
Selection tool - custom select settings:
top -0 left -0 right (the width of your tube layer) bottom - 200
Right click your blue bar and copy - de-select
Go to your image and paste as a new layer
Move tube all the way to the left
Layers - duplicate/ image - mirror
Right click your blue bar / paste as a new layer
Close bottom layer
Merge top layers visible
Layers - duplicate
On the copy layer change blend mode to screen
Then, adjust blur - gaussian blur at 3
Highlight original layer - change blend to luminance (legacy)
Go back to copy layer change blend to overlay
Lower opacity of both layers to 30
Highlight your bottom layer
Effects - plugins EC 4000 - Glass
settings: bevel width 3 smooth 100 - inside marquee checked - edge darkening 0 -
gradient shading 35 - refraction 50 - opacity 0 - tinting 50 - color (background color)
Highlight top layer - layers - new raster layer- fill with background color - blend mode soft light
Merge visible
Open tube - shift+D - right click free space of your workspace and paste as a new image
Selection tool - custom select: top 0 - left 0 - right (tube layer width) - bottom (choose size based on what you want to display ie: I chose 350 to show the wings)
Right click blue bar and copy
Activate your working image and choose custom select tool Top 0 - Left 200 - Right 500 - Bottom 200
New layer - paste into selection
Duplicate and move copy to the left between the left and center tubes - duplicate and mirror
Add drop shadow to choice to each tube layer I used H & V -3 Opacity 35 Blur 10 Color black
Merge all - flatten / select all / selection -modify- select selection borders settings: both sides checked/ anti-alias checked /border width 6
New layer fill with gold pattern / add same drop shadow / merge all flatten
Select all - modify - select selection borders size 6 new layer / fill with background color select none
repeat same step as before change border size to 2 add new layer and fill with gold pattern
Add artist copyright, license info and your name.

You're done!

Hope you enjoyed ! 

No scrap tutorial


Capsulated Tag

This tutorial is written for those with a working knowledge of  PSP.
Disclaimer update: August 17, 2024, the store I purchased this tube from has since closed. This tutorial provides you with the current link adjustment, if you don't have a license please go here to acquire one.

Supplies needed

PSP 9 or any version
Tube: Elias Chatzoudis you can purchase at  Here
Font   Affair1 you can get it at here
A scenic image of your choice
A background image of choice, I used a gazebo
Muras Meister Copies Filter Plugin free get here Here
Bordermania Plugin Filter free get it here here

Let's begin !

Open a 700 x250 image
Open your tube and choose 2 colors from it, a medium color for foreground and a dark for background
Copy tube and paste as a new layer
Effects - plugins - Muras Meister - Copies

Adjust - blur - radial blur

Layers - merge - merge visible
Effects - distortion effects - warp

Click your selection tool, then choose custom select

settings:
Hit your delete key - then deselect
Layers duplicate - image - mirror - merge visible - select all- new raster layer
Copy your scenic image and paste into selection and move it to the top
Effects - plugins - Flaming Pear - Aetherize

Lower opacity to 60
Copy the gazebo tube and paste as a new layer and resize it to fit
Effects - plugins - Flaming Pear - Aetherize
Copy and paste your tube as a new layer,  resize if needed 
Add a drop shadow of your choice
Effects - plugins - Bordermania - Capsule

Add artist name, copyright and URL, your license number and your text.
Merge layers visible  - select all - float - defloat
Selections - modify - select selection borders

New layer and fill with color of your choice
Merge layers visible.

You're Done !
Hope you enjoyed my tutorial.

Other variations of this tag


PTU Tutorial


Attention Class Dismissed
An animated tut


Note: This tut was written for those with a working knowledge of PSP and is written solely by me, any resemblance to anyone else’s is purely unintentional.
Disclaimer update: August 17, 2024, the store I purchased this tube from has since closed. This tutorial provides you with the current link adjustment, if you don't have a license please go here to acquire one.

Items needed:

PSP 9 or any version
 Classroom template Here
PTU Scrap Kit Back2School  (store closed)
A wood pattern of your choice
 I used Elias Chatzoudis you can purchase at here
Scribble regular font here
Jasc Animation Shop here


  Let’s begin:

Open template – shift +D – close original – delete credit
Highlight floor layer – select all, float, defloat – selections – modify – expand by 2
Choose your wood pattern and paste as a new layer – selections – invert – delete
Choose the ceiling layer – selections – select all, float, defloat, expand by 2- fill with white
Highlight your back wall select, float, defloat, copy paper 2, paste as new layer selections, invert, delete
Apply a drop shadow   -1/3/70/6
Highlight the left wall, select, float, defloat, expand 2, copy paper 07, paste as new layer, invert, delete – add same drop shadow
Apply same paper to right wall and apply drop shadow
Open corkboard element, paste as new layer, resize 40%
Open yellow leatherbonds, copy, paste, resize 20% and place as shown, duplicate and mirror
Open and copy notepaper yellow, paste , resize 20%, add drop shadow
Open pushpin, copy, paste, resize 70%, place as shown
Open chalkboard2, copy, paste, resize50%, drop shadow
Open notepadframered, copy, paste, resize 60%
Effects, geometric effects, perspective horizontal, distortion 50 transparent checked
Image – mirror –resize 80% - move as shown
Magic wand tool click in free space of frame, expand by 2
Copy and and paste paper 06TS as a new layer – invert – delete – keep selected
Open and copy tube, paste as a new layer place where you desire, invert selection and delete
Copy and paste your full body tube
Magic wand click inside the computer screen and paste paper12Ts, invert, delete, select none
Now, if you like you can any embellishment you like
On the computer screen add a new layer and type ATTENTION  
New layer and type CLASS DISMISSED and duplicate
 Add your name , the artists copyright, URL and your license number


Animation

X out class dismissed layer, leaving Attention layer open and copy merged
Go to animation shop and paste as a new animation
Back to PSP x out Attention open class dismissed, copy merged – go to animation shop and paste after current frame
Repeat this process two more times
In Ani Shop click in frame 1 , edit select all, frame properties 75
Save as a gif and you’re done


Hope you enjoyed my tut !!


FTU Tutorial


Substitute Teacher

This tutorial was written for those with a working knowledge of PSP and it is written solely by me from my own imagination, any resemblance is purely coincidental and not intentional.

Supplies needed

PSP9 or any version
 Large classroom template Here
Tube of choice I used Keith Garvey you can purchase here
A wood pattern
FTU scrap Back To School P4S (no longer available)
You may obtain a replacement FTU kit, Learning Is Fun here
Font I used Scribble regular

Note: This tut is only a guide for their are different items in the substituted kit. I'm sure you can work it out . Thanks for stopping by and have fun,

LET'S BEGIN!

Open template, shift D to copy, close original, delete credit layer
Click on the floor layer, selections, select all, float, defloat, selections, modify, expand by 3
In your foreground choose a wood pattern
Add a new layer to your image and fill with the pattern, delete the original floor layer
Activate the ceiling, select all, float, defloat, expand 3, new layer, fill with white or a light color from your paper choice, delete ceiling layer
Activate the back wall layer, select all, float, defloat, expand 3
Paper  16, copy, paste as new layer, selections  invert, delete
Delete the original back wall layer
Using paper 16 follow the same step as before for the left and right walls
Open the DBA teachers desk, copy, paste as a new layer, resize 60%, then 80%, move down
Open the chalkboard, copy, paste, resize 60%, then 90%, move down under the desk layer and place a little below the chair back
Open the students chair, copy, paste, resize 30%
Open the books and apple, paste and resize and place on top of student desk
From the supplies open chalkboard2 copy, paste and resize 65% and place on left wall
Layers duplicate, mirror now take your magic wand with the tolerance on 100 and click on a black area
New rater layer and fill with efd593, select none, activate your smudge brush and rub over the areas not quite covered, add a texture I used canvas fine
Open smiley face2, copy, paste, resize 10% place on board
Now place whatever you like on the board, I used the alphas and numbers
Copy and paste your tube
Add artist info and copyright and add your name
You’re done !

Thanks and hope you enjoyed !

No scrap tutorial

You 2 Can Win


Note: This tut was written for those with a working knowledge of PSP, any resemblance to another is purely coincidental.


Supplies needed:

PSP X3 or any version
You 2 Can Win template here
Tube of choice I used Ismael Rac this is a free tube, you must have a license to use this tube here
Eye candy 4000 – Gradient Glow here
Vix_Mask396 here or your choice

Let's begin !

Open template shift + D to duplicate, delete credit layer
Click on the background layer, add a new raster layer
Choose a color from your tube or use mine e15ea0
Fill your new layer with this color and apply  Vix_Mask96, merge group
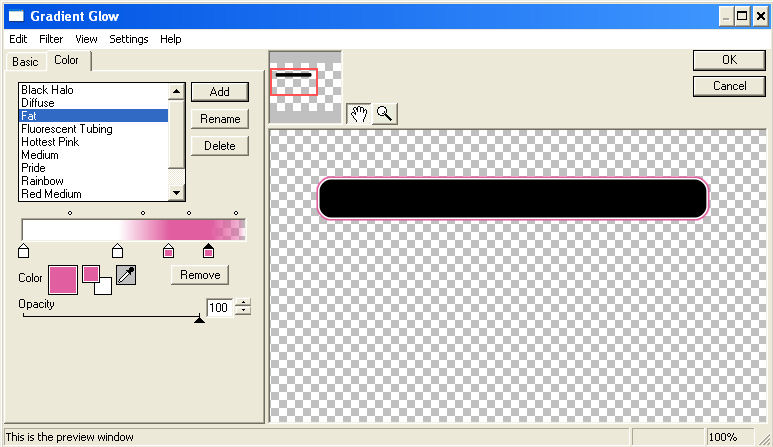
Select rectangle 1 add eye a gradient glow with these settings:


Apply the same gradient glow to all rectangle layers
Highlight the diamond back, selections, select all, float, defloat
Copy your close up tube and paste move where you like, invert your selection and delete
Duplicate your tube, on copy add a Gaussian blur at 3 and change the property to soft light
On the original change the property to luminance legacy
Add a drop shadow to the tube
Apply same technique to your heart back only this time mirror your tube
Copy your full bodied tube and paste, add drop shadow
Resize your tag if you like
Add your name, artist copyright and URL and you’re done


Hope you liked my tut, thanks for looking!

Other examples


FTU Tutorial

CHRISTMAS TIME


Note: This tut was written for those with a working knowledge of PSP, any resemblance to anyone elses is purely coincidental.
Disclaimer update: August 17, 2024, the store I purchased this tube from has since closed. This tutorial provides you with the current link adjustment, if you don't have a license please go here to acquire one.

Items you will need:

PSP 9 or any version
Template 79 by Designs by Ali, Thank you Ali here
Tube: Elias Chatzoudis you can purchase from SDNC here
Font: I used A & S Christmas Script
FTU kit, Santa Is Coming by Bea’s Creations, thanks Bea here
Vix_Mask5, thanks Vix

Let's get started:

Open template shift +D to duplicate, close or minimize original
Delete credit layer
Image – canvas size w = 600  h = 650 center = checked
Add a new layer and send to bottom, fill with white
Add a new layer and select all
Open paper15, copy and paste into selection, select none
Apply Vix_mask5 and merge group
Resize mask 105%
Select the circle, select all – float – defloat
Open and copy paper05, paste as new layer, selection, invert and hit your delete key
Delete original circle layer
Select shape 4 – float – defloat
Copy paper07 and paste as new layer, selections, invert delete
Delete original shape 4 layer
Apply same paper to shape 3 and delete original layer
Shape 2 –select all – float – defloat
Copy and paste paper09 as a new layer, selections, invert, delete
Delete original layer
Shape 1 – select all – float – defloat
Copy and paste paper 13 as a new layer, selections – invert – delete
Delete original layer
Select frame – float – defloat
Copy and paste paper 18 as a new layer, selections – invert – delete
Delete original frame layer
Keep selected
Open swag01, copy and paste, resize 60% move to frame top
Copy tube close-up and paste as a new layer, duplicate and close copy
Make sure you’re on the original tube layer, selections invert delete, select none
Open tube copy , take selection tool and draw along the bottom frame layer and hit delete
This gets rid of the tube overlapping the frame
Go back to tube and copy the body and paste as new layer move to right
Copy and paste bag01 – resize to your liking
Copy and paste candy01 – resize 80%
If you like add a drop shadow to all layers except the mask layer
Add you name – artists copyright, URL and your license number.

YOU’RE DONE !

THANK YOU FOR VIEWING MY TUTORIAL AND HAPPY HOLIDAYS!


No scrap tutorial


FORGET ME NOT

Note: This tutorial is written for those with a working knowledge of PSP.

This tutorial is written solely by Pamela Mabry and any resemblance to anyone is purely coincidental. This tutorial was updated on February 28, 2023.

Articles you will need:
Corel Paint Shop Pro 2023 or any version
Tube of choice, I used Rachel Anderson, you need a license to use her art and you can purchase at CDO
Becky Mask 022 or your choice
Horseplays Pastures Template 83 here

Let’s begin!

Open your template and the tube of your choice
Shift + D to copy template
Delete credit, check line and diamond line layers.
Select 2 colors from your tube or choose a gradient, I used the gradient, liquid soap
Highlight background layer, add a new layer and fill with gradient.
Apply mask, merge group, Image, resize 110%
From your tube, copy raster 1
On your tag paste it above the mask layer.
Move to the right, duplicate, mirror horizontal, merge down.
Apply drop shadow, duplicate, flip vertical.
Paste it again and center and erase the overhang on the tag bottom, duplicate, flip vertical
Erase overhang from the top of the tag.
Select the top frame back, select all, float, defloat.
Fill with gradient.
Keep selected and add tube, place as desired, invert, delete.
Change blend mode to luminance
Select the top frame, select all, float, defloat, fill with gradient.
Apply an inner bevel.
Large rectangle, select all, float, defloat, fill with gradient.
Copy tube and paste, invert, delete, change blend to luminance.
Select and fill the large rectangle frame with the gradient.
Apply the same processes to the bottom frame back and bottom frame.
keep selected and paste your tube into the frame, line it up with the top tube, invert, delete.
Add artists info and copyright and your name with the choice of your font.

You’re done !!!!
Thanks for viewing my tutorial


MMD Lifetime CU4CU Licence

MMD Lifetime CU4CU Licence

MMD Unlimited CU Licence

MMD Unlimited CU Licence

Miggin's Extended CU4CU License
Miggin's Extended CU4CU License

Denise Creationz Unlimited Use License
Denise Creationz Unlimited Use License

Denise Creationz CU4CU License
Denise Creationz CU4CU License

KPD Unlimited Use CU4CU License
KPD Unlimited Use CU4CU License

Scraps Dimensions CU4CU Lifetime License
Scraps Dimensions CU4CU Lifetime  License

LMB CU4CU License
LMB CU4CU License

JDD Unlimited Personal Use License
JDD Unlimited Personal Use License

JDD CU4CU License
JDD CU4CU License

Freek's Creations CU4CU License

Freek's Creations Unlimited Use License

Angelaz Creationz CU4CU License

Bubble's Dreams CU Lifetime License